Today’s Guest Blogger is the multitalented Derek Nurkowski! He could have talked about quite a few different topics today but the public demanded his recipe for cured salmon. In case you feel like curing meat is out of your league, he’s here to walk you through the process with step-by-step pictures and expert instruction. See for yourself…
Today we are going to be curing some salmon which serves as an excellent platter for a party and appetizer. Curing is an ancient process of preserving food that people have used to keep meat safe to eat much longer. It may seem intimidating, especially since most people have very little experience with curing, but it is actually a very easy process. Believe me, I had never cured anything before attempting this recipe and I executed it just fine. It is nowhere near as dangerous as home canning or mushroom hunting, so let’s give it a shot.
To start let’s gather the necessary ingredients:
- 1 whole salmon fillet pin bones removed, as far a quality is concerned I have found that Jewel has plenty good enough cuts, no need to stake out a farmers market
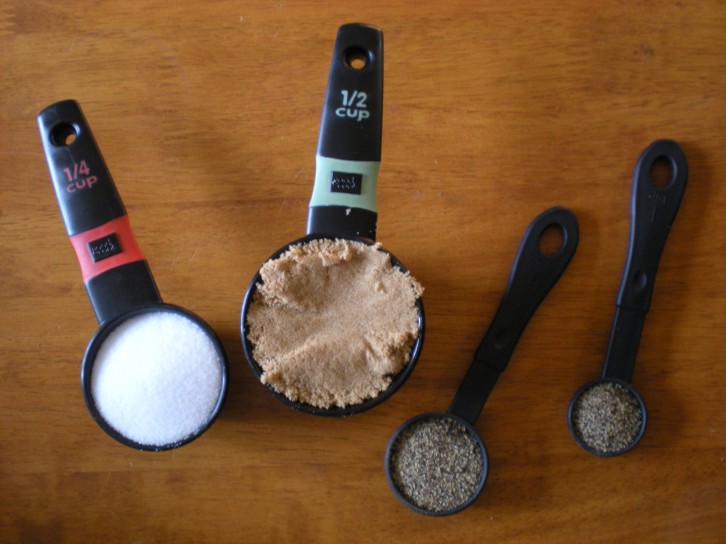
- ½ cup sugar. The recipe calls for white but I only keep brown sugar and haven’t noticed an issue
- ¼ cup salt.
- 1.5 tbsp. pepper.
- 1 cup fresh chopped dill
- Olive oil- just enough to coat the fillet
Potential Sides (these aren’t needed until you intend to serve the dish but if you can save a trip…)
- 2-3 chopped/crumbled hard boiled eggs
- 1-1.5 cup chopped red onion.
- 1 jar capers (leave them in the jar unless presentation is an issue)
- 1-2 sleeves saltine crackers (feel free to experiment with other crackers, I feel the mild flavor of saltines won’t overwhelm the flavor)
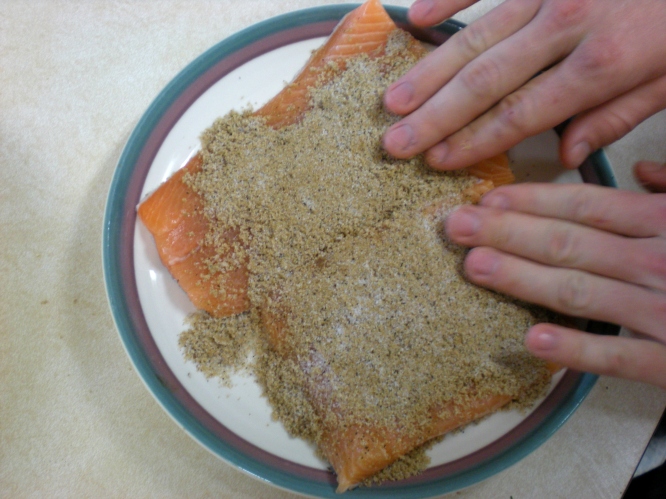
To kick things off we will mix our salt, sugar, and pepper in a big bowl. Be sure to mix all the powders evenly. For the fillet, you will need a flat dish with a lip that can sustain the liquid that will be drawn from the meat. With the skin side down evenly press the mixture over the fillet. Be sure to cover all the flesh. Then apply half of the chopped dill to the powder-coated fillet.
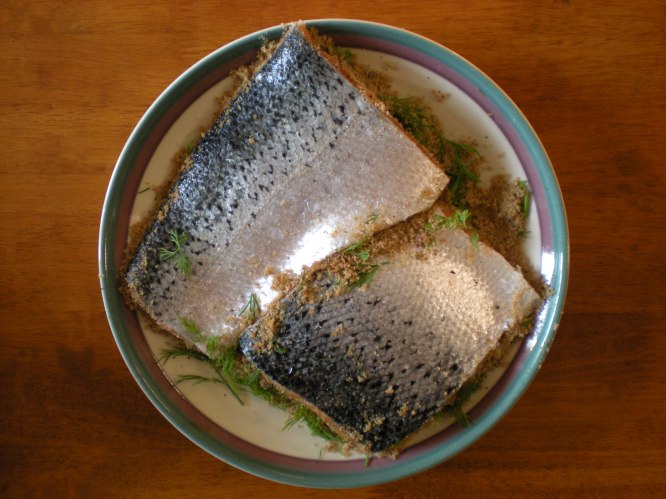
Carefully flip the fillets so they are now skin side up. Some of the powder mix will fall off- pack it around the edges of the fillet.
Now find yourself a flat board and at least two pounds of weights. Depending on what you use it may be prudent to wrap it in cling wrap. Be sure to check that when pressing the fillets your board doesn’t rest on the lip of the dish and take weight off the fillet.
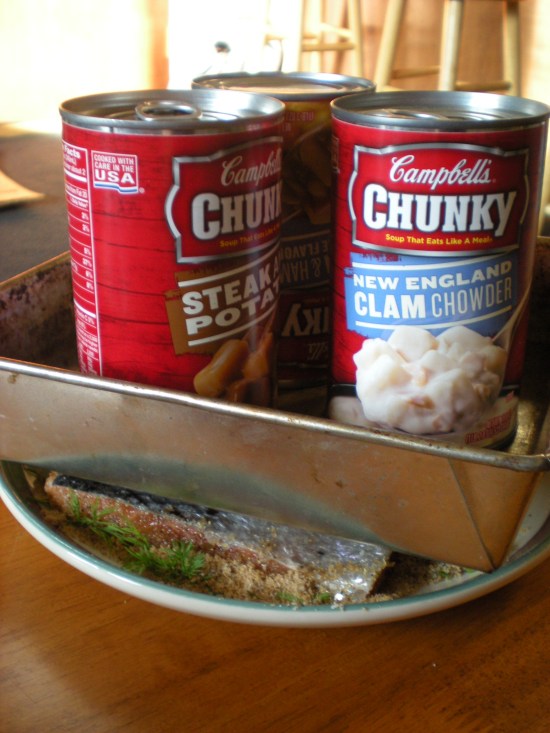
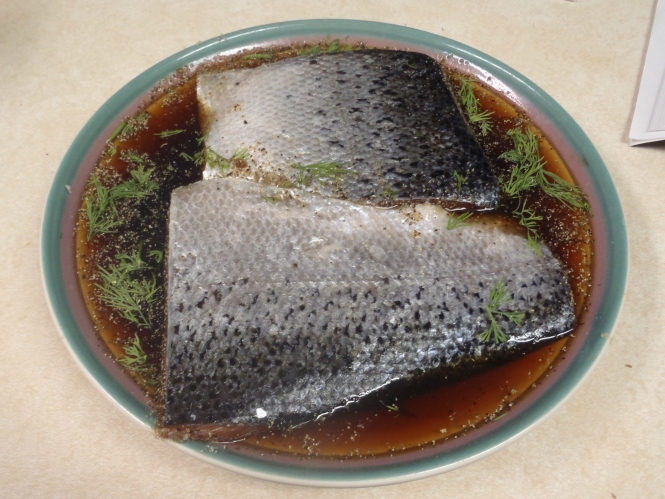
This compression is key to the curing. Note how the metal tray I used rests on the fillet and not on the lip of my plate, which has a significant lip to catch runoff.
Make some room and slide it into the fridge now uncovered. This will be the actual curing process and will take at least 24 hours, feel free to leave it in there longer if your schedule is tight.
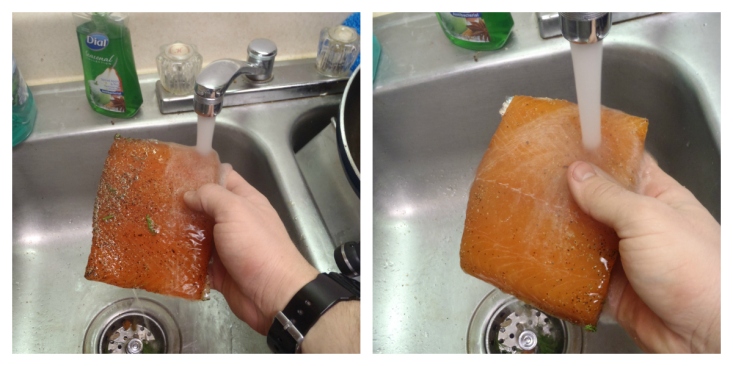
With the fillet now cured it is time to wash off our curing agent. Wash your fillet in the sink under cold water. Do this briskly and don’t soak it!
Once you are done pat dry and rub with olive oil. I prefer to keep the coat light. With the filets cured and coated in olive oil you can leave it in your fridge for a very long time. Keep it covered in saran wrap and it can last for weeks (I personally don’t know how long it will last, but it’s at least 2-1/2 weeks.)
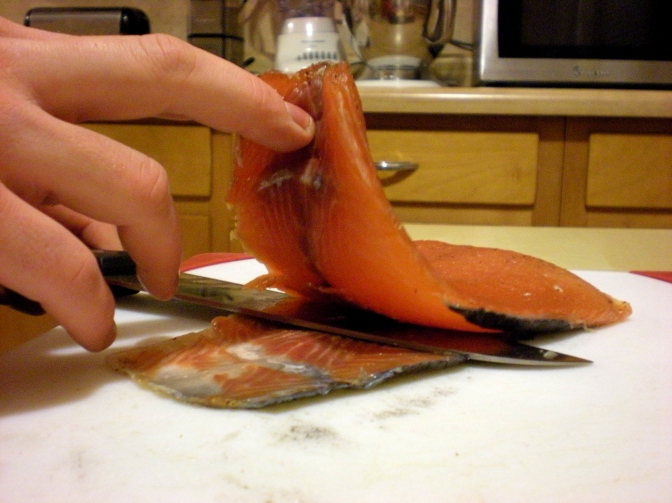
When it comes time to prepare your fillet to be served you will need a sharp, thin blade, a cutting board, and any of the side dish ingredients discussed earlier. Your first step is to remove the skin.
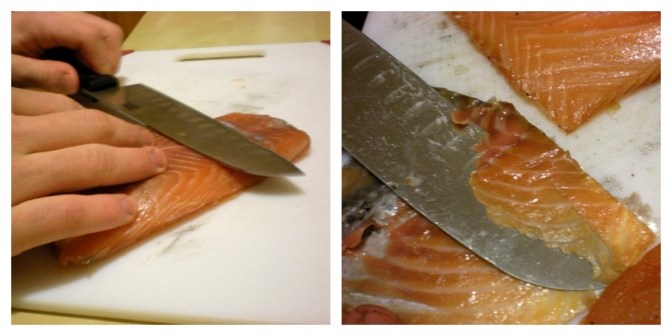
After the skin has been removed flip the fillet over and remove any traces of the skin, which has a very ‘fishy’ taste most people aren’t accustomed to. It will appear grey. You can go also go back and remove any extra meat you left on the skin.
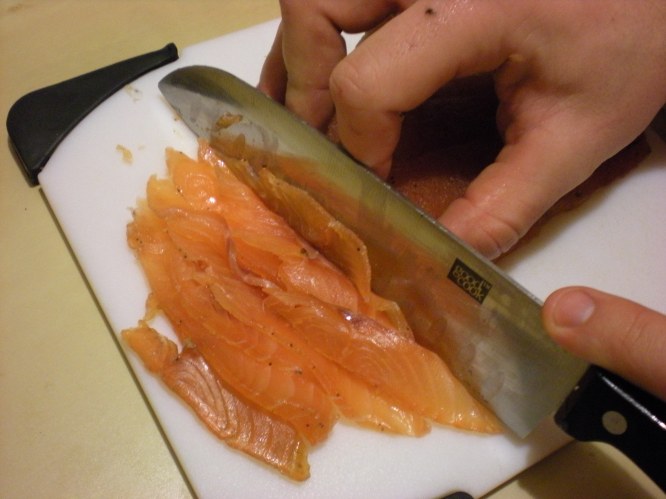
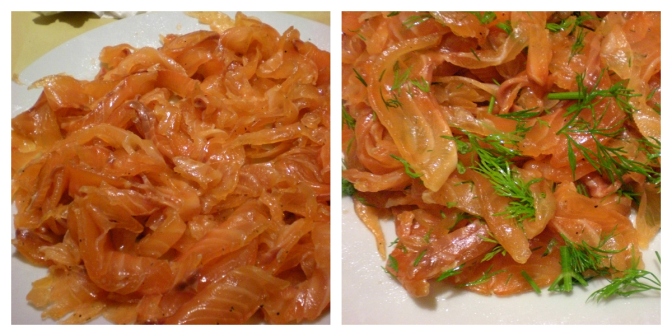
Slice the fillet as thinly as practical. Some may prefer thicker slices, so feel free to play around and find your own tastes.
Mix in the remaining dill. Looking at this image I think I should have chopped up the dill a bit more.
Your fish in now ready to be served. Now all that’s left is your presentation.
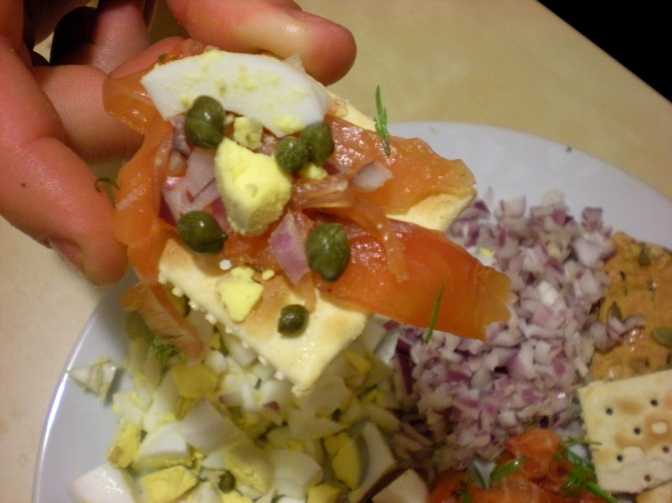
If you have guests, you may want to provide a fork or spoon for each of the ingredients. Take the capers out of the jar you bought them in as it is difficult to fish out of and the juice presents a spill hazard (sudden thought, try the juice in a martini). As your guests top their crackers some will spill off and fall- it may be a good idea to place all your ingredients on a platter. Also, move this ensemble closer to the edge of the table so guests don’t have to lean over other dishes to make their crackers.


